




Snuggle Bed Assembly Guide
To travel lightly and more sustainably, your Snuggle Bed arrives flat — its cushions are vacuum-packed so the whole bed fits into a much smaller box. Once you release them, the cushions breathe back to life and the bed finds its full, cosy shape.
Follow the step-by-step guide below or watch the video walkthrough.
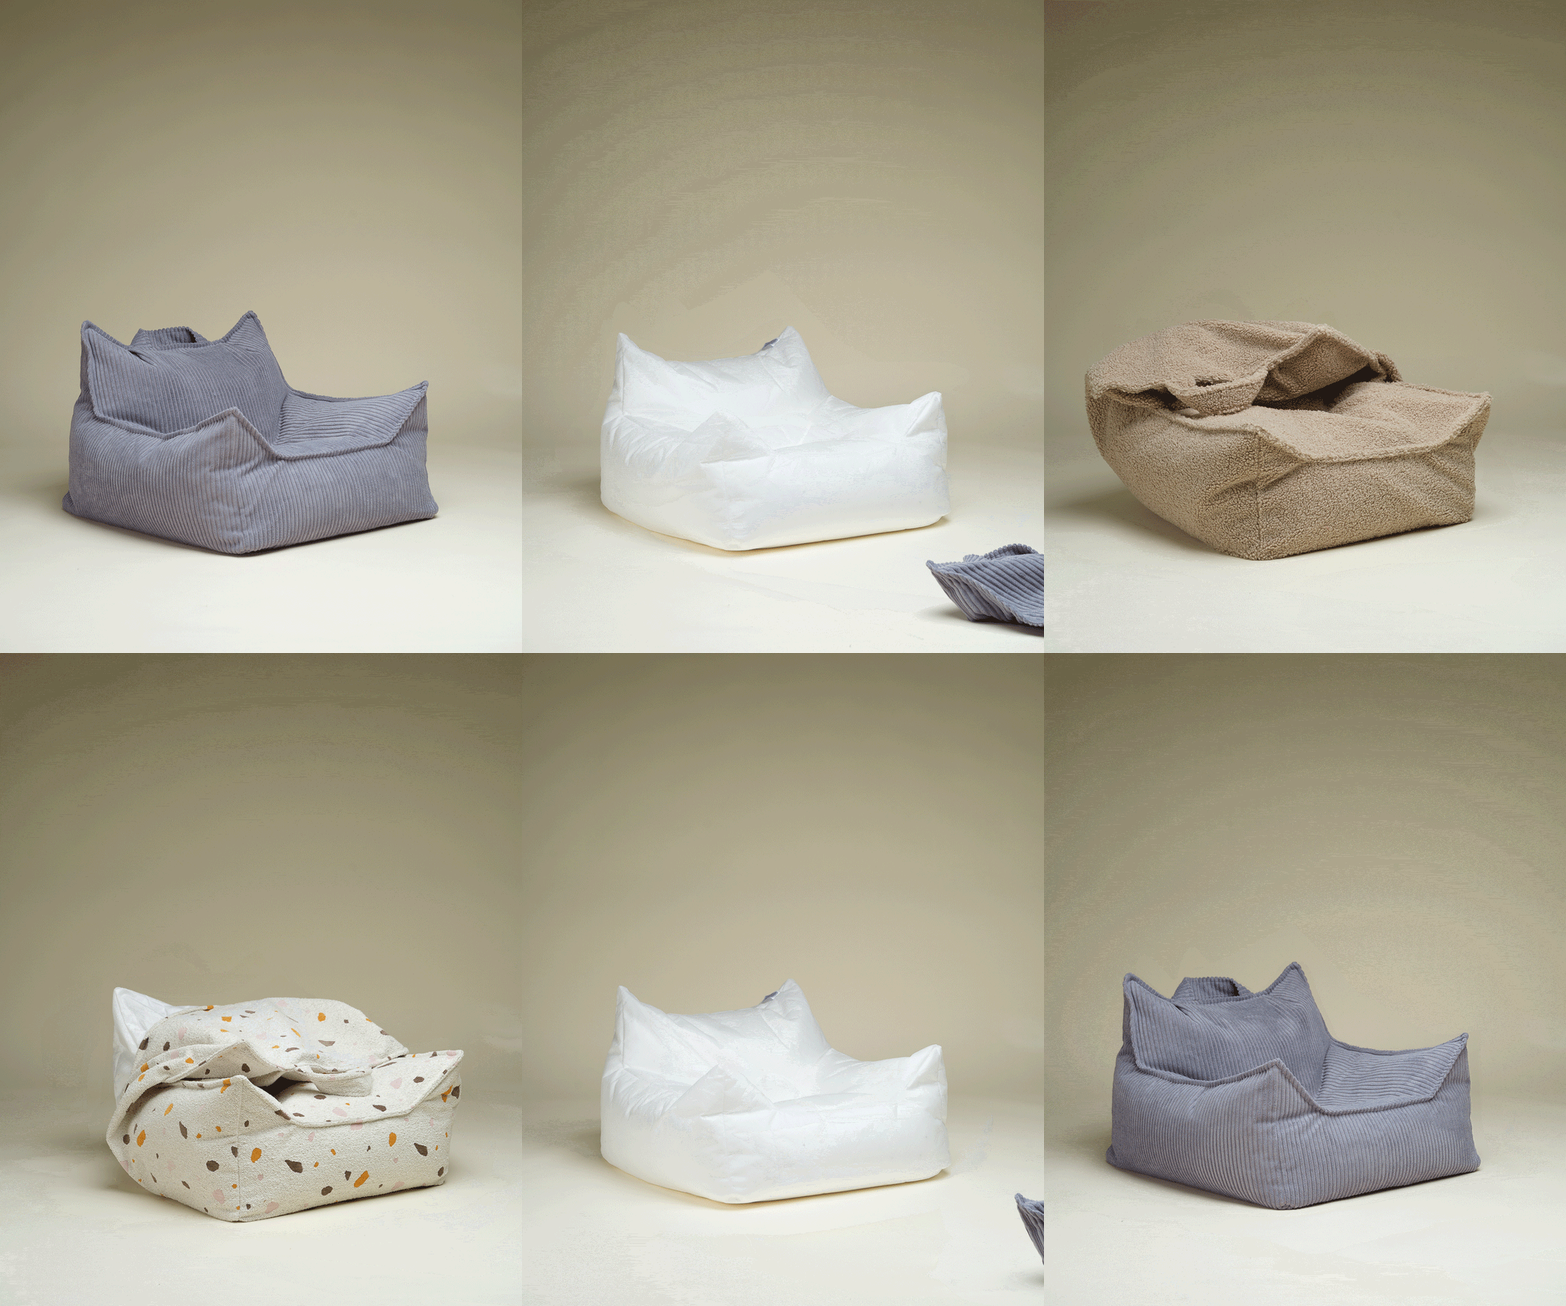
Get to know the parts

1. Long side insert x2
The longest cushion — forms longest sides of the bed.
2. Short side insert x2
Shorter cushions — forms the shortest sides of the bed.
3. Seat insert
The flat cushion that sits at the base — the sleeping and lounging surface for your pet.
4. Outer shell
The soft cover with zips, ready to be filled.
Bringing it to life
Open vacuum bags
Open the vacuum bags and let the inserts expand freely. This takes about 10 minutes normally.
Each insert has a numbered sticker the same as in the image above – simply follow the numbering when you fill the outer shell, then peel the sticker off.
Insert cushions
The cover has two zippers – one for the side cushions and one for the seat cushion.
Open the side cushion zip first (goes around the perimeter) and flip the shell upside down so the zip faces up. This is how you'll work throughout the whole assembly.
- Start with the longest inserts (1) — tuck them into their compartments
- Then move to tucking in the shorter inserts (2).
- Open the second zip and tuck in the seat cushion (3).
Reach into the corners and guide each cushion all the way in so there are no empty gaps.
Zip and shape
Check the cushion is evenly distributed — no flat spots.
Zip closed and flip the bed right side up — zip should now be on the bottom.
Watch video instructions

FAQ’s
Common questions
Yes, completely normal. 10 minutes is the average but some fillings take longer depending on temperature and how long they were packed. Give it up to 8 hours before worrying. A warmer room speeds things up.
Yes — take the inserts out of the vacuum bags and leave them in a warm room. You can also unzip the inner cushion, fluff the filling inside by hand, then zip it back up. Avoid direct heat sources like radiators.
Make sure all the inserts are fully pushed into their pockets. Then ask someone to gently hold the cushions in place while you zip it up – it's much easier with two people. Never force the zipper.
First check that all cushions are inserted the right way — the bed is built upside down, so all cushions go in upside down too.
If the orientation is correct, open the zip and check each insert is fully seated in its pocket with no gaps. Fluff the filling by hand and reposition if needed, then zip back up. Don't worry if it's not perfect straight away — the bed settles into shape after a few uses.